Blueberry and Raspberry Crumb Bars

Standard

I’m not sure what happened but somehow I completely missed Spring. I blinked and Summer is already here.  80 degrees and humid. My curly hair is not happy. So with the feeling of Summer already upon us, I had a desire for something fruity. You could substitute any fruit you desire if you’re not a fan of blueberries or raspberries. But, I have to say if you take a bite of these, you and blueberries will be BFF’s.  They have a delicious hint of lemon in them creating the perfect balance of sweet and tart. Excuse me while I go finish off the tray of these.

Blueberry Crumb Bars_1

Ingredients:

  • 1 1/2 cups flour
  • 3/4 cup sugar
  • 1/2 tsp baking powder
  • 1/4 tsp salt
  • zest of 1 lemon
  • 2 tsp cornstarch
  • 1 egg yolk
  • 1 tsp vanilla
  • 1 TBSP lemon juice
  • 2 pints blueberries
  • 1/2 cup (1 stick) cold unsalted butter cut into cubes

Blueberry Crumb Bars_2

Directions:

  • Pre-heat over to 375 degrees.  Spray an 8×9 in glass baking dish.
  • In a small bowl combine only 1/4 cup the sugar, cornstarch and lemon juice. Add in the blueberries and gently coat them in sugar mixture.  Set this aside for now.
  • In a large bowl combine remaining 1/2 cup sugar, flour, baking powder and salt. Add in the egg yolk, lemon zest, vanilla and cold butter cubes.
  • With your hands mix the butter into the ingredients. Once it resembles coarse crumbs, spread about 2/3 of the mixture into the bottom of your baking dish and press down lightly into the pan.
  • Spread your blueberries over the crumb layer evenly.
  • Sprinkle the remainder of the crumb mixture over the top of the blueberries.
  • Bake for about 35-40 minutes until the top is a light golden brown.

Blueberry Crumb Bars_1

Raspberry Crumb Bars_1

Adapted from: Smitten Kitchen

Tiramisu with Espresso Stout

Standard

I realized I haven’t posted too much these last couple of months and have been completely neglecting my blog. February was a long month even though it was short in the number of days. But I’m back and I have a few delicious recipes up my sleeve that I’m excited to share! I love being in the kitchen and I get so excited every time I share a recipe and my photos. I’m making a promise to myself to make sure I make more time for it. Simply for the pure joy I get out of doing this!

Tiramisu is one of Brad’s favorite desserts and I have to say after eating these, it’s becoming one of mine! What’s not to love about a coffee and Amaretto flavored fluffy, decadent dessert?! Ugh now I want one.

Tiramisu with Espresso Stout_3

My brother has been expanding his arsenal of delicious home-brews and sent me off with a tasty bottle of his newest concoction of Left Lane Brewing’s Espresso Stout.  It has hints of chocolate, caramel and of course espresso. I’m usually not a fan of stouts because they’re a little too heavy of a beer for me, but this one doesn’t leave you feeling like you just had an entire meal in a bottle.  It’s super smooth and a perfect partner for my tiramisu cups.  I decided to make these two ways. One incorporating the espresso stout in the recipe and one without.  Brad and I hands down loved the recipe with the stout incorporated so that’s what I’m sharing! You can always leave it out if you prefer but I suggest adding a bit more of your amaretto and coffee/espresso for that extra boost of flavor!

Ps. You can check out Left Lane Brewing and find out what other delicious brews they are mixing together here!

Tiramisu with Espresso Stout_1

Ingredients:

  • 6 egg yolks
  • 1 cup very strong coffee or espresso if you have it
  • 1/3 cup Amaretto + 2 TBSP
  • 1 container of mascarpone cheese (8oz)
  • 1 cup of espresso stout
  • 1 cup of heavy cream, whipped
  • 6 TBSP sugar
  • 1 Tsp Vanilla
  • Cocoa powder for dusting
  • 1 package of lady fingers

Tiramisu with Espresso Stout_4

Directions:

  • In a shallow bowl, combine Amaretto, coffee, and stout and set aside
  • In a separate bowl, mix together egg yolks and 3 TBSP of sugar. Beat until pale and fluffy.
  •  If you prefer to not use raw egg, you can place the whipped eggs over a double boiler with simmering water and cook until they have thickened. You’ll want to cover the bowl and place in the refrigerator until cooled.
  • Add mascarpone cheese and beat until just combined.
  • Add remaining 2 TBSP Amaretto and vanilla and mix well.
  • In a separate bowl beat heavy cream and remaining 3 TBSP sugar until fluffy and whipped.
  • Fold in whipped cream into mascarpone mixture.
  • Take lady fingers and dunk into amaretto, coffee, stout mixture. You don’t want them to be too soggy and fall apart but you want them to soak up the flavors.
  • Place lady fingers across bottom of dish.
  • Scoop mascarpone mixture on top of lady fingers until covered.
  • Sprinkle with cocoa powder.
  • Repeat layering steps until dishes are full. Cover with plastic wrap and let chill in refrigerator for at least 2 hours until ready to serve.
  • Top with raspberries or other fresh fruit and dig in!
  • Of course you’ll probably have a little left over beer, it’s the perfect drink to have alongside one of these!

Tiramisu with Espresso Stout_2

Tiramisu with Espresso Stout_5

Candied Bacon

Standard

I. Love. Bacon. You know that commercial for Frank’s Red Hot Sauce?  Well that’s how I feel about bacon.  I could put it on everything.  Bacon makes everything better. Truly.

Candied Bacon_1

Now that I’ve expressed my deep love for bacon, I’ve made candied bacon quite a few times before, also known as pig candy.  So I figured I’d share this one with all of my fellow bacon lovers out there.  Be warned though, this stuff is seriously addicting.

Ingredients:

  • 1/2 cup brown sugar
  • 3 TBSP syrup
  • 1/2 tsp cayenne pepper (more if you like it hot) Careful though, the heat from cooking makes the cayenne pepper even stronger! I recommend only a small amount.
  • 1 package of thick cut bacon
  • Wire rack for baking
  • Baking sheet covered in foil
  • Parchment paper

Directions

  • Pre-heat oven to 375 degrees
  • Mix together sugar, syrup and cayenne pepper in a shallow bowl or dish.  Place your wire baking rack on top of the baking sheet that has been covered in foil.  Dredge the bacon slices in the brown sugar mixture and press the sugar onto the bacon strips.
  • Place on wire rack and repeat for each slice.
  • Don’t let the slices touch as they may end up sticking together when baking.
  • Bake for about 20-30 minutes until dark but not burned.
  • Let cool slightly and remove from wire rack onto parchment paper
  • Serve full slices or cut into small bite size pieces.

These are a great snack to serve for guests, they’ll definitely go over well for Sunday Football!

Candied Bacon_2

Pumpkin Pudding Mousse

Standard

It’s the first official day of Fall! What better way to celebrate than with a pumpkin dessert?  How about a pumpkin pudding mousse?  Fall is my absolute favorite time of the year. You can’t go wrong with anything pumpkin flavored. This pumpkin pudding has more of mousse texture to it, rather than a pudding but it’s a great combo of both!

Pumpkin pudding mouse 1

Ingredients:

  • 1 can sweetened condensed milk
  • 1 can pumpkin puree (15 ounces) – Not pumpkin pie mix
  • 1 teaspoon ground cinnamon
  • 1 teaspoon ground allspice
  • 1 teaspoon ground cloves
  • 1 teaspoon ground ginger
  • 1 package instant vanilla pudding mix
  • 1/4 cup water
  • 2  8 oz containers of whipped topping
  • 10 shortbread cookies broken into small bit size pieces

Pumpkin Pudding Mousse 2

Directions:

  • In a large bowl mix together milk, pumpkin puree, vanilla pudding mix, water and spices. Beat all ingredients until smooth and well blended.
  • Gently fold in 1 container of whipped topping until it is well blended and you no longer see any streaks of whipped topping.
  • Use a martini glass or any parfait dish you like.  Scoop a layer of pumpkin mixture and then sprinkle a few shortbread cookies. Top with another scoop of pumpkin mixture and more cookies.  Top with a scoop of whipped topping. Sprinkle cinnamon on top for garnish. If you’re like me and love whipped topping, I added a layer of whipped topping in the middle of the layers!
  • Let refrigerate for at least an hour to let the cookies soften up under the pumpkin mixture. The longer they sit, the softer the cookies become. Serve cold and enjoy!

Pumpkin Pudding Mousse 4

Pumpkin Pudding Mousse 3

Pumpkin Pudding Mousse 5

Blueberry Pie

Standard

I love summer. Blueberries are in season and that means blueberry pie! I can’t believe I used to hate blueberries.  My dad used to bribe me when I was little to try to get me to eat them.  He’d offer me a dime for each one I ate. I don’t think I ever got past 2.  I always seemed to get the tart ones and they turned me off.  But now my taste buds have changed, thank goodness! I love blueberries and I love blueberry pie.

Ingredients:

  • 1 baked pie shell
  • 4 cups blueberries, rinsed
  • 1/2 cup water and an additional two TBSP water
  • 2 TBSP cornstarch
  • 1/2 cup sugar
  • 2 tsp lemon juice
  • Pinch of salt

Directions:

  • In a saucepan combine 1 cup blueberries and 1/2 cup water and bring to a boil.
  • In a separate small bowl whisk together 2 TBSP water and 2 TBSP cornstarch.
  • When blueberries come to a boil, lower heat to a simmer and stir constantly until blueberries begin to burst. Continue stirring for about 4 or minutes. Add cornstarch mixture, lemon juice and a pinch of salt. Simmer mixture until it becomes translucent.
  • Remove from the heat and stir in the remaining blueberries. Pour mixture into pre-bake pie crust (I took the easy route on this and bought a bought crust that just needed to be baked).  Cover with plastic wrap and place in fridge for at least 2 hours for blueberry mixture to set and gel.
  • When ready, serve with a large spoonful of cool whip! The best way to eat blueberry pie of course! Some people like to spread cool whip over entire top of the pie but I just prefer spoon out large amounts of cool whip on my plate instead.

Enjoy!

Almond Chocolate Chip Cookies

Standard

I love anything with almond in it.  It’s my weakness when it comes to anything sweet.  I like my cookies super soft so I leave them slightly under done. You don’t want to brown these too much, they’re way better on the softer side. I’m lactose intolerance but I started drinking almond milk, which is absolutely delicious. These cookies are perfect with it!

Ingredients:

  • 2 1/4 cups all-purpose flour
  • 1 teaspoon baking soda
  • 1 teaspoon salt
  • 1 cup butter, softened
  • 3/4 cup granulated sugar
  • 3/4 cup packed brown sugar
  • 1 teaspoon vanilla extract
  • 2 teaspoon almond extract
  • 2 large eggs
  • 1 8oz can of almond paste
  • 1 bag of semi-sweet chocolate chips
  • 1/2 cup sliced almonds

Directions:

  • Pre-heat over to 375 degrees
  • Combine flour, baking soda and salt in a medium bowl and set aside.
  • In a separate bowl beat together butter and both sugars until fluffy. The beat in the almond paste a little at a time until well combined. Add in vanilla and almond extract. Beat in the eggs one at a time. Gradually beat the flour mixture into the butter/sugar mixture.  Mix in chocolate chips and slices almonds.
  • Drop tablespoon sized balls of cookie dough onto a greased baking sheet. Bake for 9-11 minutes.  Watch carefully so they don’t burn.

Cinnamon Buns

Standard

Cinnamon Buns_1

Oh my goodness ya’ll! I got engaged this weekend!!! I’ve been on cloud nine since Friday.  I could not be more excited or happy! I have to say, I’ve definitely been pretty side tracked at work the last two days.  All I want to do is stare at my ring.  Ok, I’ll stop gushing now.

Onto the yummy stuff! So last week my FIANCE and I were craving cinnamon buns. But we had nothing in the fridge but a roll of Pillsbury buttermilk biscuits. I figured I could roll them out into 1 sheet and make something with them.  Brad doubted me though, which I don’t think he ever will again as he ended up eating 4 of these babies.  They seriously came out a thousand times better than those packaged biscuits. Check out my recipe below and enjoy these gooey, cinnamon-y, sweet pastries!

Cinnamon Buns_2Ingredients:

  • 1 package of Pillsbury buttermilk biscuits
  • 1 tsp vanilla extract
  • 1/2 cup of sugar
  • 2 tsp of cinnamon
  • 3 TBSP butter melted

Icing/Glaze Ingredients:

  • 1/2 cup of confectioners sugar
  • 1/2 tsp vanilla extract
  • 1 tsp cinnamon
  • 1-2 Tbsp milk

Directions:

Pre-heat oven to 350 degrees.  Combine and form biscuits into a ball.  Roll out the dough into an even sheet on a floured surface.  Try to make it as even as possible in a rectangular shape.

Mix together the sugar and cinnamon in a small bowl and put aside.

Mix together 2 TBSP of the melted butter and the vanilla in a separate small bowl.  You will need the rest of the butter to brush on the outside before baking.

Once you have your dough rolled out, spoon the vanilla/butter mixture evenly onto the dough.  Sprinkle the cinnamon/sugar mixture on top of the butter and spread it evenly covering as much of the surface as possible.  Then you will want to gently roll the dough long ways into a tube.  Next you will need to gently slice the dough into 1 1/2 in pieces (approximately) and lay each piece into a buttered dish.  You can use a round dish or a Pyrex rectangular dish.  Which ever you have on hand.  I like the round pie dishes better just to keep all the sides of the cinnamon buns from getting too browned on the edges.  The round dish lets the pieces touch and lay next to one another better.  1 package should make about 8-10 cinnamon buns. Spread the remaining melted butter over the buns evenly with a brush.

You’ll just want to bake these according to the regular package directions. I recommend starting at 20 min and checking them.  You don’t want them to be too browned or over done.  These guys are better soft and gooey.

Cinnamon Buns_5

Once they are done, you’ll want to mix your glaze/icing.  Pour ingredients together in a bowl and mix well.  Adjust the powdered sugar and milk until you’ve reached the consistency you want.  Pour the glaze over top of the buns while they are still warm so the glaze melts and covers them well.  You definitely don’t want to skimp on this part! Finally, enjoy!

Cinnamon Buns_4

Cinnamon Buns_3

Carrot Cake with Pineapple Cream Cheese Frosting

Standard

Carrot Cake_1

Happy Monday!
I hope everyone had a wonderful weekend. For those that celebrate, hope you had a happy Easter filled with lots of time with your families.  I spent my weekend in my home state of New Jersey eating my body weight in cake and food for 3 days straight.  As my mother always says when I walk in the door “It’s an eating fest!” This weekend was just that! Full of pastas, cake and cream puffs galore. You’ll never hear me complain though. The smell of homemade pasta sauce filling the air so much that you can smell it in the driveway as you pull up to the house.  What more could an Italian Jersey girl ask for?! Mother, daughter time spent in the kitchen cooking is one of my favorite things to do.  Some of the best memories I have growing up were made sitting around the kitchen table at my parents house.  Good food, good company and good conversation. All the best things!

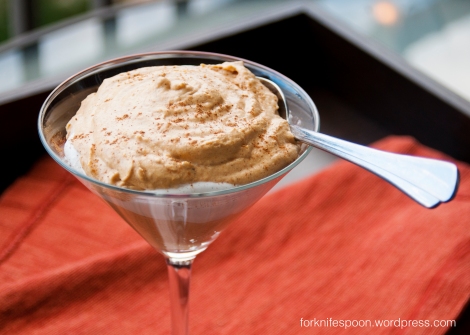
My mom and I spent Friday afternoon baking away to prep for the Easter eating fest that was to begin.  Carrot cake is one of my favorite Spring time desserts. This one in particular is delightfully wonderful. I hope you enjoy!

Pineapple Carrot Cake

Ingredients:

For the cake:

  • 1 1/2 cups grated fresh carrots
  • 1 cup chopped walnuts
  • 1/2 cup finely chopped pineapple
  • 2 1/4 cups all-purpose flour
  • 2 teaspoons ground cinnamon
  • 1/2 teaspoon freshly grated nutmeg
  • 1/2 teaspoon ground ginger
  • 1 teaspoon baking soda
  • 1 teaspoon baking powder
  • 1/2 teaspoon fine salt
  • 4 large eggs
  • 1 1/2 cups sugar
  • 1 1/4 cups vegetable oil
  • 2 (2.5-ounce) jars pureed carrot baby food

For the icing:

  • 2 (8oz) blocks of cream cheese at room temperature
  • 1 cup (2 sticks) unsalted butter at room temperature
  • 2-3 cups powdered sugar
  • 1 tsp vanilla extract
  • 1/2 cup finely diced pineapple

Directions:

Pre-heat oven to 350 degrees. Butter 2 (8in) round or square cake pans and line bottom of pans with parchment paper. Dust flour over inside of each pan.

In a small bowl toss the carrots, walnuts and 1/2 cup pineapple with 3/4 cup of the flour and set aside.

Whisk the remaining 1 1/2 cups flour, cinnamon, ground nutmeg, ginger, baking soda, baking powder and salt together in a separate medium bowl.

In another large bowl, beat together eggs and sugar with electric mixer for about 5 minutes until light and fluffy. Gradually add in vegetable oil while still beating the egg and sugar mixture.  Next beat in the pureed carrot baby food jars. Gently fold in the dry ingredients over the wet ingredients to make a loose batter. Gently fold in the nuts, carrots and pineapple mixture into the batter.

Pour batter evenly into both pans and make sure they are even. Bake cakes about 45 min (time will vary by oven) until firm to the touch and a tooth pick comes out clean.  Let cakes cool completely before covering with frosting.

For the icing:

Beat cream cheese and butter together in a large bowl until smooth and fluffy.  Gradually add in powdered sugar and continue beating until smooth, light and fluffy.  Add in vanilla extract. Fold in diced pineapple.

Cover one layer of cake with icing, making sure to spread it evenly. Place second cake on top of iced cake and spread remaining icing over the top and all sides of the cake. Make sure to spread it evenly and gently to make sure you don’t break the cake.   Refrigerate until ready to eat and then enjoy! You can leave out the pineapple if you aren’t a fan of fruit in your carrot cake but I think it adds a little something extra!

Carrot Cake_2