Blueberry and Raspberry Crumb Bars

Standard

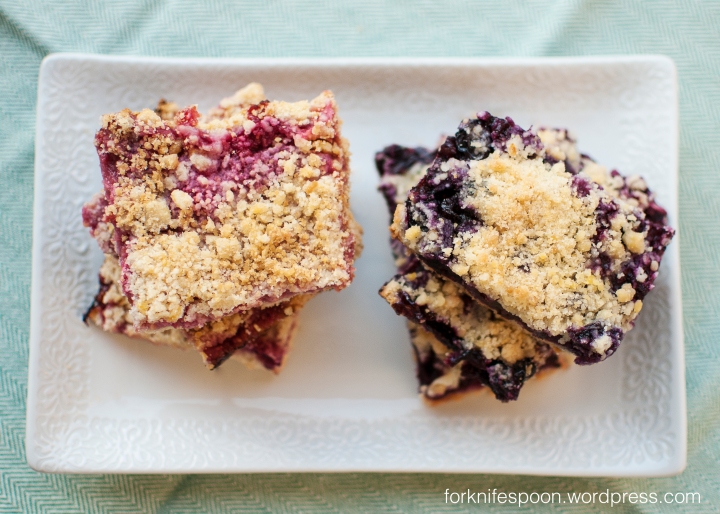
I’m not sure what happened but somehow I completely missed Spring. I blinked and Summer is already here.  80 degrees and humid. My curly hair is not happy. So with the feeling of Summer already upon us, I had a desire for something fruity. You could substitute any fruit you desire if you’re not a fan of blueberries or raspberries. But, I have to say if you take a bite of these, you and blueberries will be BFF’s.  They have a delicious hint of lemon in them creating the perfect balance of sweet and tart. Excuse me while I go finish off the tray of these.

Blueberry Crumb Bars_1

Ingredients:

  • 1 1/2 cups flour
  • 3/4 cup sugar
  • 1/2 tsp baking powder
  • 1/4 tsp salt
  • zest of 1 lemon
  • 2 tsp cornstarch
  • 1 egg yolk
  • 1 tsp vanilla
  • 1 TBSP lemon juice
  • 2 pints blueberries
  • 1/2 cup (1 stick) cold unsalted butter cut into cubes
Blueberry Crumb Bars_2

Directions:

  • Pre-heat over to 375 degrees.  Spray an 8×9 in glass baking dish.
  • In a small bowl combine only 1/4 cup the sugar, cornstarch and lemon juice. Add in the blueberries and gently coat them in sugar mixture.  Set this aside for now.
  • In a large bowl combine remaining 1/2 cup sugar, flour, baking powder and salt. Add in the egg yolk, lemon zest, vanilla and cold butter cubes.
  • With your hands mix the butter into the ingredients. Once it resembles coarse crumbs, spread about 2/3 of the mixture into the bottom of your baking dish and press down lightly into the pan.
  • Spread your blueberries over the crumb layer evenly.
  • Sprinkle the remainder of the crumb mixture over the top of the blueberries.
  • Bake for about 35-40 minutes until the top is a light golden brown.

Blueberry Crumb Bars_1

Raspberry Crumb Bars_1

Adapted from: Smitten Kitchen

Cheddar Biscuit Breakfast Sandwiches

Standard

Cheddar Biscuits_1

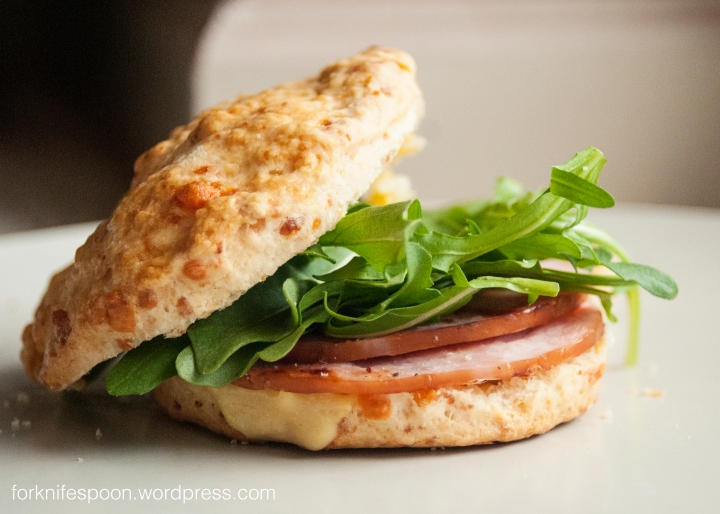
I’ve been in a breakfast craving mood lately. We made these cheddar biscuits a while ago, and I decided I needed to share, mostly because of the delicious mustard sauce I made with them. I’m sitting here drooling just thinking about how good the stuff was. It’s so velvety and smooth and just flat-out delicious. Ok I’ll stop talking about it now.  Anyways, my biscuits came out a little thinner than I wanted so I recommend cutting these on the thicker side so they come out nice and fluffy.

Ingredients:

  • 3 1/2 cups all-purpose flour, plus more to dust for shaping
  • 2 tablespoons baking powder
  • 1 teaspoons salt
  • 12 tablespoons cold unsalted butter diced (1 1/2 sticks)
  • 1 1/2 cup grated sharp cheddar cheese
  • 1/2 cup grated parmesan cheese
  • 3/4 cup buttermilk (if you don’t have buttermilk see note below)
  • 1 large egg

Cheddar Biscuits_4

Directions:

  • Pre-heat oven to 400 degrees.
  • In a large bowl combine flour, cheeses, salt, baking powder and butter. Use an electric mixer with a paddle attachment if you have one, if you’re like me and don’t just use your hands, you’ll get a little arm workout in while you do this! You’ll want mix until the chunks of butter are no larger than the size of peas.
  • Add the buttermilk and mix until the dough is just coming together.
  • Turn the dough out onto a floured surface and knead the dough gently. Pat the dough into a large rectangle, about 1 inch thick.
  • Using a 3 inch round biscuit cutter cut biscuits out and place on baking sheets lined with parchment paper.  Leave about an inch or two between biscuits so they can expand when baking.
  • Shape remainder dough back into a rectangle and re-cut additional dough with biscuit cutter. Rolling out dough a 3rd time may make dough tough. Recommend only rolling it out twice. You should get about 10-12 biscuits.
  • In a small bowl beat egg and a splash of water to create an egg wash.  Brush tops of biscuits with egg wash.
  • Bake for about 20 minutes.  Time may vary depending on your oven so it’s always best to start a few minutes lower and check on them. You want them to have a nice golden color.
  • These biscuits can easily be frozen and baked at a later time too.  Once you’ve cut out your biscuits place on baking pan and place in freezer. Once frozen you can transfer them to a plastic freezer bag. You will need to add additional baking time to frozen biscuits when you are ready to use them.
  • We made breakfast sandwiches with these that were absolutely delicious! Or you can eat them just as they are!
  • If you want to turn these into a delicious breakfast sandwich like I did, they pair perfectly with left over ham you may have around. I added a little arugula and Brad topped his with a fried egg.
  • Also made this really delicious mustard sauce that is so good, you’ll literally want to put it on everything. There are a few different variations of this type of mustard sauce out there that I saw and ended up playing around with and as soon as we tasted this I knew it was perfect.

Cheddar Biscuits_3

Mustard Sauce:

Ingredients:

  • 1/4 cup sugar
  • 1/8 cup apple cider vinegar
  • 2 tablespoons dry ground mustard
  • 2 egg yolks
  • 1/2 teaspoon salt
  • 1/2 cup half and half

Directions:

  • Place all ingredients in a medium sauce pan and bring to a boil.  Make sure to stir often and keep an eye on it.
  • Once it comes to a boil you might want to pour it through a mesh strainer to get any clumps out that may have formed.
  • Pour it into a bowl and cover with plastic wrap.  Place in fridge until it sets and cools or serve it warm.
  • Seriously this stuff is so good.  Slather it on your biscuits top with ham and arugula and eat up! You might even want to dip your sandwich in it, it’s that good. This is great to serve as a sauce with ham too.

Cheddar Biscuits_6

Tiramisu with Espresso Stout

Standard

I realized I haven’t posted too much these last couple of months and have been completely neglecting my blog. February was a long month even though it was short in the number of days. But I’m back and I have a few delicious recipes up my sleeve that I’m excited to share! I love being in the kitchen and I get so excited every time I share a recipe and my photos. I’m making a promise to myself to make sure I make more time for it. Simply for the pure joy I get out of doing this!

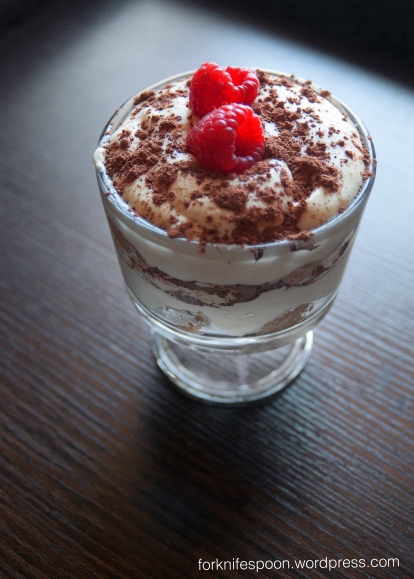
Tiramisu is one of Brad’s favorite desserts and I have to say after eating these, it’s becoming one of mine! What’s not to love about a coffee and Amaretto flavored fluffy, decadent dessert?! Ugh now I want one.

Tiramisu with Espresso Stout_3

My brother has been expanding his arsenal of delicious home-brews and sent me off with a tasty bottle of his newest concoction of Left Lane Brewing’s Espresso Stout.  It has hints of chocolate, caramel and of course espresso. I’m usually not a fan of stouts because they’re a little too heavy of a beer for me, but this one doesn’t leave you feeling like you just had an entire meal in a bottle.  It’s super smooth and a perfect partner for my tiramisu cups.  I decided to make these two ways. One incorporating the espresso stout in the recipe and one without.  Brad and I hands down loved the recipe with the stout incorporated so that’s what I’m sharing! You can always leave it out if you prefer but I suggest adding a bit more of your amaretto and coffee/espresso for that extra boost of flavor!

Ps. You can check out Left Lane Brewing and find out what other delicious brews they are mixing together here!

Tiramisu with Espresso Stout_1

Ingredients:

  • 6 egg yolks
  • 1 cup very strong coffee or espresso if you have it
  • 1/3 cup Amaretto + 2 TBSP
  • 1 container of mascarpone cheese (8oz)
  • 1 cup of espresso stout
  • 1 cup of heavy cream, whipped
  • 6 TBSP sugar
  • 1 Tsp Vanilla
  • Cocoa powder for dusting
  • 1 package of lady fingers

Tiramisu with Espresso Stout_4

Directions:

  • In a shallow bowl, combine Amaretto, coffee, and stout and set aside
  • In a separate bowl, mix together egg yolks and 3 TBSP of sugar. Beat until pale and fluffy.
  •  If you prefer to not use raw egg, you can place the whipped eggs over a double boiler with simmering water and cook until they have thickened. You’ll want to cover the bowl and place in the refrigerator until cooled.
  • Add mascarpone cheese and beat until just combined.
  • Add remaining 2 TBSP Amaretto and vanilla and mix well.
  • In a separate bowl beat heavy cream and remaining 3 TBSP sugar until fluffy and whipped.
  • Fold in whipped cream into mascarpone mixture.
  • Take lady fingers and dunk into amaretto, coffee, stout mixture. You don’t want them to be too soggy and fall apart but you want them to soak up the flavors.
  • Place lady fingers across bottom of dish.
  • Scoop mascarpone mixture on top of lady fingers until covered.
  • Sprinkle with cocoa powder.
  • Repeat layering steps until dishes are full. Cover with plastic wrap and let chill in refrigerator for at least 2 hours until ready to serve.
  • Top with raspberries or other fresh fruit and dig in!
  • Of course you’ll probably have a little left over beer, it’s the perfect drink to have alongside one of these!

Tiramisu with Espresso Stout_2

Tiramisu with Espresso Stout_5

New England Clam Chowder

Standard

Can you believe January is already almost over!? I sure can’t….

This whole polar vortex business seems to bring about my soup making desires lately. All I want to do is curl up on the couch with a nice big bowl of hot delicious soup and watch some cheesy chick flicks. Mmm sounds pretty good right about now actually as I sit here looking out the window at the sideways snow that’s blowing outside.

This past summer we took a trip up to Cape Cod in Massachusetts where my brother and sister-in-law got married and we took the ferry out to Martha’s Vineyard and made a pit stop at Martha’s Vineyard Chowder Company for some clam chowder and my-oh-my were my taste buds happy as, well… clams! Yup I’m throwing in some cheesy puns here. I could have sat there all day and ate that soup until I exploded. It was so good.  If I  didn’t have to worry about flying back to DC I would have bought multiple containers to go and stock piled my fridge with them. I haven’t gotten clam chowder out of my head since.

 Clam Chowder 1

I finally decided to attempt my own version. I gotta say, it came out pretty fantastic. You can totally substitute fresh whole clams in this, but I’m on a bit of a smaller budget. This soup is sure to warm your soul and put you in couch-potato mode.

Clam Chowder 2

Ingredients:

  • 1 large onion diced
  • 3 stalks celery chopped
  • 2 cups diced baby red potatoes
  • 6 (6 1/2-ounce) cans chopped clams, undrained
  • 1 bottle clam juice
  • 1/2 teaspoon dried Thyme
  • 2 garlic cloves, minced
  • 1/2 cup butter (1 stick)
  • 1 qt. Half and half
  • 1 ½ tsp salt
  • Pinch of pepper
  • 2 bay leafs
  • 1/2 cup all-purpose flour
  • Oyster crackers for topping!

Directions:

  • In a large sauce pot add 2 TBSP of butter and melt. Add onion, celery, salt, pepper, thyme, garlic and cook until vegetables are softened.
  • Drain clams reserving liquid. Add liquid from clams and bottle of clam juice to vegetables. Add diced potatoes and bay leaves and bring to boil. Allow to simmer for about 15 minutes or until potatoes are tender.
  • In a separate pot, melt remaining butter and whisk in the flour.
  • Add half and half and stir constantly until thickened.
  • After potatoes are soft, add flour/milk mixture to pot and bring back to a boil. Cook for about 10-15 minutes or until mixture thickens to the consistency you like. Stir well!
  • Add the clams and cook for a bout 2-3 minutes.
  • Remove bay leaves before serving.

Clam Chowder 3

Chicken Pot Pies

Standard

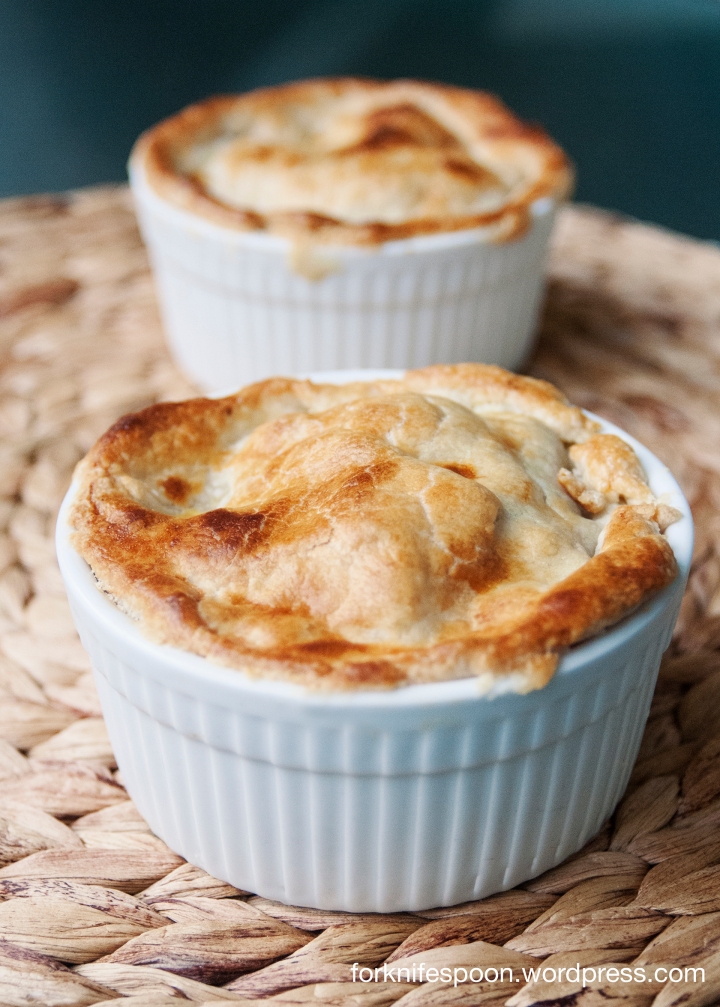
It took me about 3 tries to make these mini, deliciously comforting pot pies turn out presentable.  First, I over stuffed the little puffs of heavenly goodness a little too much.  Everything good in them came bursting out.  What a sad moment.  Then I spilled the peas…

Spilled Peas

Then I forgot the peas.  Clearly peas and I don’t get along too well.

But, I finally managed to get everything into the dish and voila! Tasty individual pot pies full of savory goodness.

Chicken Pot Pies1

Ingredients:

  • 1 package refrigerated pie crust
  • 2-3 medium red-skin potatoes cleaned and diced
  • 1 celery stalk diced
  • 2 carrots peeled and diced
  • 1 clove garlic finely chopped
  • 1/4 cup peas
  • 1 can chicken broth
  • Olive oil
  • 1 small onion finely chopped
  • 3 TBSP parsley finely chopped
  • 2 chicken breasts or chicken thighs
  • 1 egg
  • salt and pepper
  • 3 TBSP butter
  • 3  TBSP flour
  • 4 ramekins or 2 large (depending on the size)

Chicken Pot Pies2

Directions:

  • Pre-heat oven to 375 degrees
  • Drizzle olive oil over chicken and rub to coat. Season with salt and pepper and place in a metal roasting pan
  • In a medium bowl combine diced potatoes, carrots, celery, garlic and onion.  Season with salt, pepper, parsley and drizzle with olive oil. Toss together. Add vegetables to roasting pan with chicken.
  • Bake until chicken is done and vegetables are tender.
  • When cooked, remove chicken and shred when it is cool enough to touch. Put vegetables and shredded chicken in a bowl off to the side.  Add the peas!
  • Place the roasting pan on the stove and melt butter.
  • Once the butter is melted and hot add the flour to make a roux.
  • Add the chicken broth. Using a whisk or wooden spoon, scrape all the yummy brown drippings from roasting the chicken and vegetables. You don’t want to lose all that flavor! Plus it helps make cleaning up the pan easier later!
  • Reduce it down, you want it to be fairly thick in consistency since these are mini pies.  You don’t want it to be too runny of a liquid. Stir well until the roux turns a golden color and is smooth.
  • Turn oven temperature up to 425 degrees.
  • Pour the roux into the chicken and vegetable mixture.
  • Line the ramekins with the puff pastry.  If you don’t have ramekins you can cut the pastry dough into 4 equal rectangles and create mini pies that way. Just be careful when sealing them up so they don’t burst open.
  • Scoop chicken mixture into each so they are full but not over flowing.
  • Seal each ramekin with more puff pastry to close off the top. Pinch the edges to seal them closed.
  • In a small bowl beat egg and water.  Brush the top of each ramekin with egg wash.
  • Place on a baking dish and bake for about 20 minutes or until golden brown in color.

Chicken Pot Pies3

Chicken Pot Pies4

Tomato, Basil Soup with Grilled Cheese Croutons

Standard

Grilled cheese and tomato soup brings me right back to my childhood.  It’s comfort food for the soul for me.  My dad always used to make tomato soup and grilled cheese when we were kids when he was home watching us while my mom worked weekend shifts at the hospital.  There was always a large selection of meal choices when my dad was the one cooking. Hot dogs, grilled cheese and soup or his specialty: poor man’s pizza. Maybe one day I’ll share that infamous pizza recipe, but only after I convince my fiancé that it’s the most amazing thing to ever be created and he stops judging me anytime I reminisce about it.  I always went for the later two options.  My dad’s grilled cheese was always the best.  I’m not sure why, probably because he would put layers of butter on the bread before grilling them.  Food always tastes better though when someone else makes it.  I always tell my mom her tomato sauce tastes a thousand times better than mine, even though I use her recipe.  I think she left out some secret ingredient when she taught me how to make it.

Anyway, since I can’t eat an entire grilled cheese sandwich and bowl of soup anymore without being unable to get out of my chair, this is the perfect adult version of tomato soup and grilled cheese.  If you love this combo as much as I do, I hope it will bring you back to warm memories of your childhood! Nom away!

Tomato Soup with Grilled Cheese Croutons

Ingredients:

  • 1 tsp dried basil
  • 1 tsp dried oregano
  • 1 tsp onion powder
  • 1 tsp garlic powder
  • 3 TBSP olive oil
  • 2 – 28 oz cans of plum tomatoes
  • 1 medium sweet onion finely chopped
  • 3 cloves garlic finely diced
  • 1/2 cup chopped fresh basil
  • 1 cup heavy cream
  • 1 – 14 oz can chicken broth
  • 1/4 cup grated parmesan cheese
  • 4 slices of bread (your choice for grilled cheese) I find a firmer bread is great for this to get that crouton effect
  • 4 slices of cheese (your choice for grilled cheese)
  • Butter

Directions:

  • In a medium sauté pan heat olive oil over medium-high heat.  Add onion and sauté until soft and translucent about 5 minutes.
  • Add garlic and cook for an additional minute just until fragrant. Remove from heat.
  • In a blender, add half of the tomatoes and onion/garlic mixture.  Blend until it reaches the consistency you like. I like mine a little thicker/chunkier but Brad likes his smoother.
  • Heat a large sauce pot over medium-high heat and add tomato mixture to pot.  Repeat blending with remaining tomatoes and add to pot.
  • Add chicken broth, basil, oregano, onion powder and garlic powder to pot and stir.
  • Bring to boil and reduce heat to a simmer.
  • Add the parmesan cheese and heavy cream and allow to simmer for about 10 minutes before serving.
  •  While the soup is simmering away, make your grilled cheese to your liking! Once done, cut up in small squares and top soup with as many as you like!
  • This makes about 6 servings

Tomato Soup with Grilled Cheese Croutons ©forknifespoon.wordpress.com

Pumpkin Parmesan Cheddar Biscuits

Standard

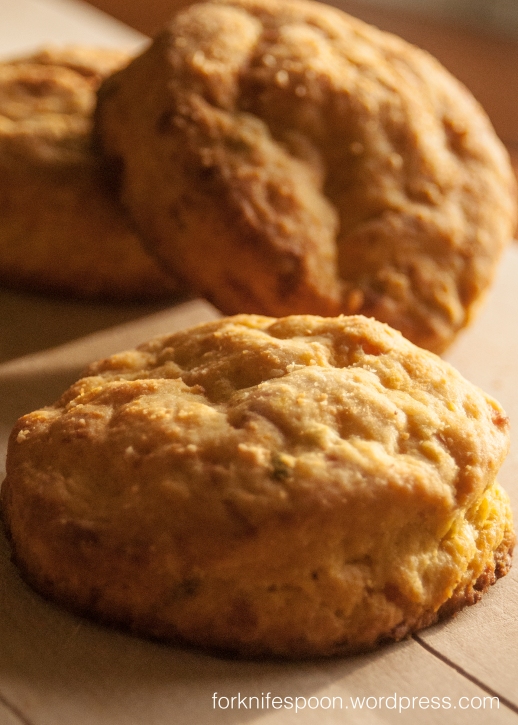
So, I realize I’m a little behind on posting this, being that Thanksgiving is over but I made these biscuits for a pumpkin baking contest at work and decided I had to post them here!  I don’t have a big sweet tooth, I crave more savory foods so I decided to try something other than a sweet treat for the baking contest.  I’m sure many people still have pumpkins or cans of pumpkin still sitting around waiting to be made into something delicious! These are a great substitute of your regular dinner rolls or biscuits.  I love the combination of sage and pumpkin.  I whipped up some honey butter as well to spread on these and that touch of sweetness really made these even more delicious.

Pumpkin Parmesan Biscuits_2Ingredients:

  • 2 cups all-purpose flour
  • 1 TBSP baking powder
  • 1 Tsp salt
  • 1 TBSP sugar
  • 1/2 cup parmesan cheese
  • 1/2 cup shredded cheddar cheese
  • 1/2 cup pure pumpkin
  • 1/4 cup buttermilk
  • 1/2 cup (1 stick) cold unsalted butter.
  • 2 TBSP butter melted
  • 2 TBSP finely chopped sage
  • Parchment paper

Pumpkin Parmesan Biscuits_1Directions

  • Pre-heat oven to 400 degrees and line a baking sheet with parchment paper.
  • Whisk together flour, sugar, salt and baking powder.  Add in parmesan, cheddar cheese and sage and mix together.
  • Dice cold butter and add to dry ingredients.  You’ll have to get your hands a little messy here and mix together the butter with the dry ingredients until it starts looking like crumbs the size of peas.
  • In a separate bowl mix together buttermilk and pumpkin then pour into flour mixture and work with your hands or a fork until formed into a soft dough.
  • On a floured surface, roll dough out into a ball.  Press out or roll with rolling-pin into a 1/2 in thick disk. Cut out biscuits using a 2 in round cookie cutter or you can use something else round about that size if you don’t have a cookie cutter on hand.
  • Transfer onto baking sheet.
  • Melt 2 TBSP butter in a small bowl and brush on top of the biscuits.  Sprinkle with a little more parmesan
  • Bake in oven for approximately 15 min or until golden brown on top.  Time will vary depending on your oven.

You can re-roll out the remaining dough to make additional biscuits but the more you roll it out, the less fluffy your dough will be. The recipe should make between 8-16 biscuits depending on size and how many times you roll the dough back out. Spread a little honey butter on these and you won’t want to stop eating them!

Pumpkin Parmesan Biscuits_3

Candied Bacon

Standard

I. Love. Bacon. You know that commercial for Frank’s Red Hot Sauce?  Well that’s how I feel about bacon.  I could put it on everything.  Bacon makes everything better. Truly.

Candied Bacon_1

Now that I’ve expressed my deep love for bacon, I’ve made candied bacon quite a few times before, also known as pig candy.  So I figured I’d share this one with all of my fellow bacon lovers out there.  Be warned though, this stuff is seriously addicting.

Ingredients:

  • 1/2 cup brown sugar
  • 3 TBSP syrup
  • 1/2 tsp cayenne pepper (more if you like it hot) Careful though, the heat from cooking makes the cayenne pepper even stronger! I recommend only a small amount.
  • 1 package of thick cut bacon
  • Wire rack for baking
  • Baking sheet covered in foil
  • Parchment paper

Directions

  • Pre-heat oven to 375 degrees
  • Mix together sugar, syrup and cayenne pepper in a shallow bowl or dish.  Place your wire baking rack on top of the baking sheet that has been covered in foil.  Dredge the bacon slices in the brown sugar mixture and press the sugar onto the bacon strips.
  • Place on wire rack and repeat for each slice.
  • Don’t let the slices touch as they may end up sticking together when baking.
  • Bake for about 20-30 minutes until dark but not burned.
  • Let cool slightly and remove from wire rack onto parchment paper
  • Serve full slices or cut into small bite size pieces.

These are a great snack to serve for guests, they’ll definitely go over well for Sunday Football!

Candied Bacon_2

Tomato Alfredo Pasta

Image

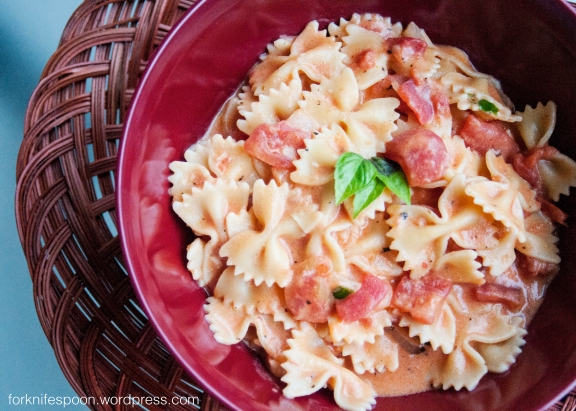
This recipe is super easy and so delicious! It’s a great way to change-up a regular tomato or Alfredo sauce! If you’d rather keep it a little more on the lighter side, you can always lessen the amount of the Alfredo sauce.

Tomato Alfredo Pasta_1

Ingredients:

  • 1/2 lb Farfalle pasta (or any kind you prefer)
  • 1 small onion, finely chopped
  • 2 cloves garlic finely minced
  • 1 – 28oz. can diced tomatoes
  • 5-6 fresh basil leaves chopped
  • 3 TBSP olive oil
  • 1 TBSP butter
  • 3/4 cup of half and half
  • 3/4 cup grated parmesan cheese

Directions:

  • Boil pasta according to directions.  I like mine al dente so it’s not too over cooked.  Reserve 1/3 cup pasta water.
  • In a large sauce pan heat olive oil over medium heat.  Add the onions and cook until soft, about 3 minutes.  Add the garlic and cook about 1 minute.
  • Stir in the tomatoes and bring to a simmer.  If you like a thinner sauce you can substitute the diced tomatoes for a can of crushed tomatoes.  Or blend tomatoes in a blender or with an Emerson blender to get the consistency you like.
  • In a separate pan, melt butter for the Alfredo sauce over medium heat.  Whisk in flour and stir until smooth and begins to brown.
  • Whisk in half and half into the flour mixture and season with salt and pepper.
  • Bring to a simmer and whisk continuously until thickened.
  • Whisk in parmesan cheese.  The sauce will get pretty thick at this point, so this is where you will add in the past water you reserved.  You may not need it all, so add it in a little at a time. You just want to thin out the sauce a little bit.
  • Add the basil to the tomato sauce and stir together.
  • Add the Alfredo sauce to the tomato sauce and mix together and then add your pasta to the sauce and mix well together.
  • Serve and top with a sprinkle of parmesan cheese.

Tomato Alfredo Pasta_2

Buffalo Chicken Wonton Cups

Standard

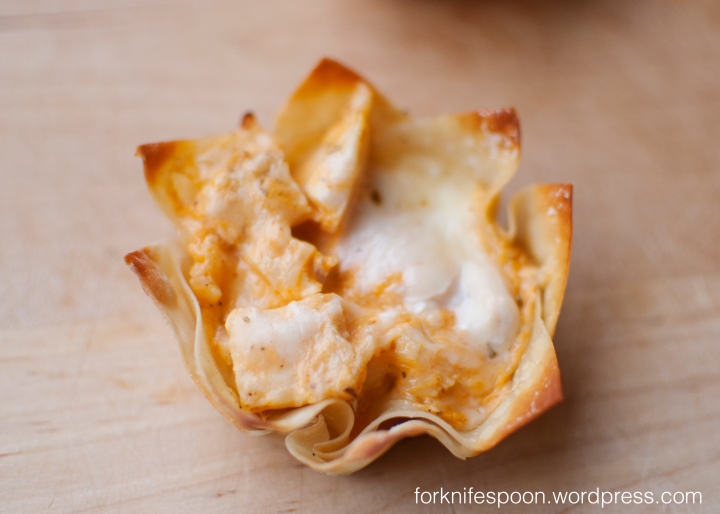
Buffalo Chicken Wonton Cups_4

Part two from this weekends Halloween treats sampling! These buffalo chicken wonton cups are sure to please anyone! I couldn’t stop eating them.  The crispy wonton cups and cheesy, creamy buffalo chicken are so great together. These are perfect to serve as an appetizer or better yet, a great football Sunday snack!

Buffalo Chicken Wonton Cups_5

Ingredients:

  • 3  boneless, skinless chicken breasts
  • Salt, pepper and paprika and chili powder for seasoning
  • 4oz cream cheese softened
  • 1/4 cup of Monterey jack cheese plus extra for topping
  • 1/2 cup of your favorite buffalo sauce
  • 1 package of 48 wontons
  • cupcake tin
  • cooking spray
  • Ranch or blue cheese dressing

Buffalo Chicken Wonton Cups_4

Directions:

  • Cook chicken in baking dish seasoned with salt, pepper and paprika. I’m not a fan of boiling chicken so I baked mine in the oven.  Allow to cool so you can handle it and shred.
  • Pre-heat oven to 375 degrees for cupcakes.
  • In a large bowl mix together shredded chicken and your favorite buffalo sauce.  You may need to add more or less sauce depending on how hot you like it.  You want to make sure you have enough so that the chicken is well coated. Mix in softened cream cheese until well blended.
  • Stir in 1/4 cup cheese
  • Spray cupcake tin with cooking spray.  Place 2 wonton wrappers in the cupcake tin, making sure the corners don’t align with each other.  This creates that double layered, staggering look to the wonton cup.
  • Scoop a tablespoon on chicken mixture into cup and repeat until all cupcake holders are filled.
  • Place a small dollop of ranch or blue cheese dressing on top of chicken mixture on each cupcake.  Sprinkle top with cheese.
  • Bake in over for about 10 minutes or until edges of wontons look golden and crispy.
  • Serve with additional ranch or blue cheese dressing on the side and dig in!

Buffalo Chicken Wonton Cups_5

Buffalo Chicken Wonton Cups_6